


 Call Us




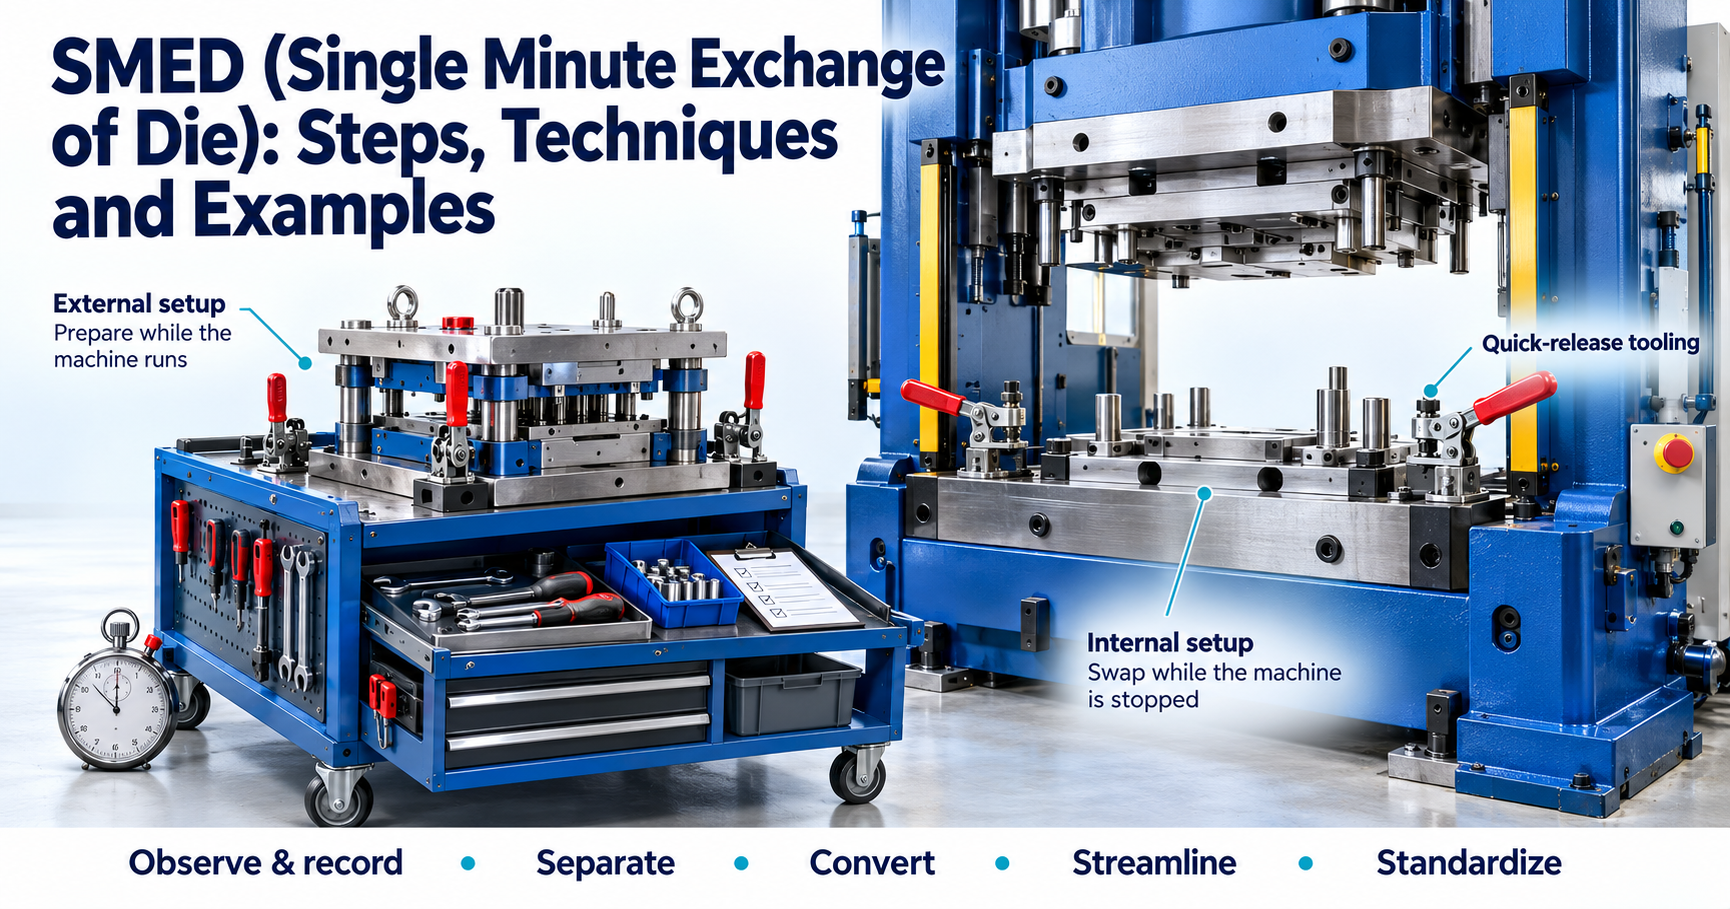
SMED (Single Minute Exchange of Die) is a lean method for cutting changeover time, which is the gap between the last good part of one job and the first good part of the next. It works by splitting setup work into internal steps (possible only when the machine is stopped) and external steps (possible while it runs), moving as much work as possible to external, and then simplifying what is left. Shigeo Shingo developed SMED to bring setups under ten minutes.
Key Highlights of SMED (Single Minute Exchange of Die)
- SMED stands for Single Minute Exchange of Die. "Single minute" means a changeover that takes single-digit minutes, so anything under 10.
- Shigeo Shingo built the SMED methodology through work at Toyo Kogyo, Mitsubishi Heavy Industries and Toyota between 1950 and 1969.
- The core idea is simple: separate internal setup from external setup, convert internal work to external, then streamline everything that remains.
- SMED follows five steps: observe and record, separate, convert, streamline and standardize.
- Common SMED techniques include quick-release fasteners, parallel operations and preset tooling.
- Shorter setup time makes batch size reduction, mixed model production and faster customer response practical.
- In Lean Six Sigma projects, SMED often runs as a focused Kaizen event inside the Improve phase of DMAIC.
Introduction
Picture a stamping press that takes three hours to switch from one part to another. With a changeover that long, nobody wants to stop the press. Planners schedule huge batches, the warehouse fills with parts nobody needs this week, and an urgent customer order waits behind thousands of units of something else.
That is the problem SMED was built to solve. Single minute exchange of die is one of the most practical lean tools on the shop floor because it goes straight after setup time, and most of its gains come from better organization rather than expensive machinery. When a team films a changeover for the first time, the footage usually surprises them. A large share of the downtime goes to searching for tools, walking to the stores, waiting for a forklift or making trial-and-error adjustments.
SMED came out of the Toyota Production System and became a core part of what the world now calls lean (for a broad overview, see Lean manufacturing on Wikipedia). If you are new to lean thinking, our guide on what the lean process is gives useful background before you go further.
In this guide, you will learn what SMED means, where it came from, the five SMED steps, the techniques that make quick changeover possible, real examples of SMED, the metrics to track and the common mistakes to avoid. We will also look at how SMED fits into Lean Six Sigma projects.
What Is SMED?
SMED is a structured method for reducing the time it takes to change a machine, line or process over from one product to the next. The name comes from metal stamping, where the "die" is the shaped tool a press uses to form a part. Today, the same thinking applies to swapping moulds, nozzles, labels, fixtures, software recipes or anything else that has to change between jobs.
The target in the name is ambitious. A single minute die exchange does not mean exactly one minute. It means getting the changeover down to a single-digit number of minutes, so nine minutes or less. The Lean Enterprise Institute: SMED glossary entry describes it the same way, as a process for changing over equipment in fewer than ten minutes.
Changeover time is measured from the last good piece of the old run to the first good piece of the new run, produced at normal speed and quality. That definition matters. The clock does not stop when the machine restarts. It stops when the line is making a good product again, so trial runs, scrap and adjustments all count.
From a lean management SMED perspective, long setups are pure waiting. Operators stand idle, machines sit still and material piles up between steps. These are classic examples of the seven wastes of lean, especially waiting, inventory and motion. SMED removes that waste without asking people to work faster. It simply changes what gets done while the machine runs and what gets done while it is stopped.
History and Shigeo Shingo
Shigeo Shingo, a Japanese industrial engineer, developed SMED over roughly 19 years. His work is closely tied to the Toyota: Toyota Production System, which depends on small batches and frequent changeovers to make a wide mix of products without large inventories.
The story usually starts in 1950 at Toyo Kogyo (now Mazda) in Hiroshima. Shingo was studying a set of large body-moulding presses that were not running at the expected capacity. During one die change, he watched operators lose a long stretch of time searching for a single missing bolt. That moment showed him two very different kinds of setup work. Some work genuinely needs the machine stopped, such as fixing a die in place. Other work, such as finding bolts and bringing tools, can be done while the machine is still running. He called these internal setup and external setup.
In 1957, at a Mitsubishi Heavy Industries shipyard, he applied a similar idea to a large planing machine. By adding a second worktable, the next job could be set up while the current one was being machined, which raised output considerably.
The defining moment came at Toyota in 1969. A 1,000-ton press needed about four hours for a die change. Shingo's team cut it to about 90 minutes. Taiichi Ohno, the architect of the Toyota Production System, then asked for three minutes. Within a few months, the team got there by converting even more internal work into external work. Shingo later documented the approach in his 1983 book, published in English in 1985 as A Revolution in Manufacturing: The SMED System. You can read a short summary of this background in the Single-minute exchange of die on Wikipedia.
SMED Manufacturing Benefits
The obvious gain from SMED manufacturing is more uptime, but the bigger wins usually come from what shorter changeovers allow a plant to do differently.
- Smaller batches and less inventory: When a changeover takes ten minutes instead of two hours, it no longer makes sense to run a month of stock to avoid stopping. Batch size reduction cuts work-in-progress, storage space and the cash tied up in finished goods.
- Faster response to customers: Short setups let you switch to an urgent order the same day instead of next week.
- More capacity without new machines: Time saved on setup becomes production time. On a bottleneck machine, that can be worth as much as buying extra equipment.
- Better quality: Standard settings and fewer trial runs mean less start-up scrap and fewer first-piece defects.
- Mixed model production: Plants can build several product variants in a repeating sequence, which smooths demand on suppliers and upstream processes.
- Safer, calmer changeovers: Organized tools and clear steps reduce lifting, rushing and guesswork, so fewer people get hurt during a setup.
SMED Steps
The SMED methodology follows a clear sequence. Each step builds on the one before it, so skipping ahead (for example, buying new clamps before you understand the changeover) usually wastes money. Here are the five steps most teams use.
Observe and Record the Changeover
Start by watching a real changeover from beginning to end. The best way is to video it, ideally with a second camera following the main operator. Do not ask the team to perform a "good" changeover for the camera. You want to see what normally happens.
Then break the video into individual elements and time each one. A simple sheet with columns for the element, start time, end time, duration and who did it is enough. A typical list might include "walk to tool crib for spanner, 4 min" or "wait for crane, 7 min". Many teams also draw a spaghetti diagram to show how far people walk during the setup.
If you are choosing which machine to start with, value stream mapping helps. A map of the whole flow shows where long changeovers create bottlenecks and inventory, so you can focus SMED where it will matter most.
Separate Internal and External Elements
Next, go through every element and label it. Internal setup is anything that can only be done while the machine is stopped, such as removing the old die or bolting in the new one. External setup is anything that can be done while the machine is still running the previous job, such as fetching the next die, finding the right tools, printing work orders or warming up a mould.
This step alone often cuts changeover time by 30 to 50 percent. The reason is that many plants do almost everything as internal work by habit. The machine stops, and only then does someone go looking for the new tooling. Simply doing the external work before the stop, using a pre-changeover checklist, removes that waiting with almost no cost.
A useful test for each element is to ask: "Does the machine physically have to be stopped for this?" If the answer is no, it is external.
Convert Internal to External
Now look hard at the elements that remain internal and ask whether any of them could be changed so they become external. This is where real engineering creativity comes in.
Some common conversions:
- Preheating an injection mould with an external heater, so it is already at temperature when it goes into the machine.
- Assembling a die and its fixtures on a separate plate or cart, so the whole unit drops in at once.
- Using standardized die heights or adapter plates, so the press does not need to be adjusted for each tool.
- Preparing the next product's settings or recipe in advance, so the operator loads it with one action.
This is exactly how Shingo's team went from 90 minutes to three minutes at Toyota. They did not work faster. They moved more of the work outside the stop.
Streamline All Elements
With the internal list as short as possible, simplify every element that is left, both internal and external. For internal work, the aim is to shorten each step. For external work, the aim is to make preparation reliable and fast.
Typical improvements include replacing bolts with quick-release clamps, eliminating adjustments by using fixed stops and locating pins, running tasks in parallel with two people, and removing the need for trial runs. Workplace organization matters here too. Tools stored at the point of use, shadow boards and labelled carts all come straight from 5S in Six Sigma, and 5S is often the first thing a SMED team puts in place around a machine.
Adjustments deserve special attention. In many changeovers, the actual tool swap is quick but the trial-and-error tuning afterwards takes the longest. Every adjustment you remove is time and scrap saved.
Standardize
The final step locks in the gains. Write the new method down as standard work: the sequence of tasks, who does each one, the time each should take and the checks at the end. Keep it visual, with photos and short instructions, and post it at the machine.
Add a pre-changeover checklist that lists every tool, part, document and material needed. Train every shift on the new method, not only the team that designed it, and track actual changeover times against the standard. When times drift up, treat it as a problem to solve, not a reason to give up. Standardization also creates the baseline for the next round of improvement, because SMED is rarely finished in one pass.
SMED Techniques
The five steps tell you what to do. SMED techniques are the practical tricks that make each step work on the shop floor. There are dozens of them, but three show up in almost every setup reduction project.
Quick-Release Fasteners
Threaded bolts are one of the biggest hidden time sinks in any changeover. Shingo pointed out that a bolt only tightens on its last turn, and the turns before that are wasted motion. If a bolt needs 15 turns to come out and 15 to go back in, multiply that by eight bolts and you have a lot of internal time spent turning a spanner.
Quick-release options remove most of those turns:
- Toggle and cam clamps that lock with a single lever movement.
- Pear-shaped (keyhole) bolt holes, so the bolt is loosened one turn and the plate slides off without removing the bolt.
- U-slots and C-washers, so the nut stays on the stud.
- Quarter-turn fasteners and hydraulic or magnetic clamping on presses and moulding machines.
A good rule is "one motion, one turn, or no turns at all". Also standardize bolt sizes, so a single tool works for the whole changeover and nobody has to hunt for a different spanner.
Parallel Operations
Some machines are large enough that one operator spends half the changeover walking from one side to the other. Putting two people on the job, each working on their own side with a clear task sequence, can cut the internal time by more than half because the walking disappears.
Parallel work needs coordination. Each person should have their own written sequence, and the team should agree on signals (a call, a hand signal or a light) for steps that must happen together, such as lifting a heavy die. Without this, two people simply get in each other's way.
The second person does not have to be dedicated to that machine. In many plants, a material handler or team leader joins only for the changeover window and then goes back to their normal work.
Preset Tooling
Presetting means getting the tool or fixture ready to its final position before it reaches the machine, so the operator does not adjust it in place. A CNC shop, for example, might measure tool lengths offline on a presetter and load the offsets straight into the control, so the first part does not need test cuts.
Other preset ideas include:
- Fixed stops and locating pins that place a die in exactly the right spot every time.
- Marked scales and setting gauges on guide rails, so a width change becomes "move to 72 mm" instead of "adjust until it looks right".
- Standard die heights and shim blocks that remove shut-height adjustment on a press.
- Stored recipes on the machine controller for speeds, temperatures and pressures.
Preset tooling is what turns adjustment, the most variable part of a changeover, into a predictable step.
Examples of SMED
The principles are easier to grasp with real situations in mind. Here are two examples of SMED, one from outside the factory and one from a typical production line.
Pit Stop Analogy
A Formula 1 pit stop is the best-known picture of quick changeover. A modern stop to change all four tires takes around two seconds, done by a crew of roughly 20 people. In everyday terms, it is a changeover of the car from one set of tyres to another.
Look at how it maps to SMED:
- External setup: New tyres are warmed, laid out in position and checked long before the car arrives. Every crew member knows their spot and their task.
- Internal setup: Only the work that truly needs the car stationary, such as removing and fitting wheels, happens during the stop.
- Quick-release fasteners: Each wheel is held by a single centre-lock nut, removed and fitted with one powered wheel gun.
- Parallel operations: All four corners are worked on at the same time, with front and rear jacks lifting the car together.
- Standardization: Crews rehearse the same sequence hundreds of times a season and review footage after every stop.
Compare that with changing a tire on your own car at the roadside, which takes most people 15 to 30 minutes. The task is the same. The difference is almost entirely preparation, tooling and method.
Packaging Line Example
Now take a more ordinary case. A beverage plant runs a filling and capping line that switches between 500 ml and 1 litre bottles several times a week. The changeover takes 90 minutes, so planners keep runs long and the warehouse holds plenty of both sizes. The figures below are illustrative, but they reflect the pattern most SMED teams see.
The team videos two changeovers and lists every element. They find that a large part of the 90 minutes is spent on work that could happen while the line is still filling the previous size, such as fetching change parts and labels. They then apply the remaining steps.
| Changeover element | Before (min) | After (min) | What changed |
| Fetch change parts, labels and caps | 15 | 0 | Made external: a labelled kit cart is staged at the line before the run ends |
| Paperwork and line clearance | 10 | 4 | Pre-filled checklist; documents prepared during the previous run |
| Remove and fit guide rails and star wheels | 25 | 8 | Quick-release knobs replace bolts; two operators work in parallel |
| Adjust conveyor width and filler heights | 20 | 4 | Preset scales and fixed stops on rails; stored recipe for filler heights |
| Trial runs and fine adjustment | 15 | 5 | Fixed settings remove most trial-and-error; first-off checklist |
| Wait for quality approval | 5 | 1 | QA alerted 15 minutes ahead and present at restart |
| Total | 90 | 22 | About 76% shorter changeover |
The largest single saving is not from new equipment. It comes from separating and converting work, then removing adjustments. The quick-release knobs and colour-coded change parts cost very little.
What the plant does with the saved time matters even more. Instead of one 90-minute changeover per day, it can now run about four changeovers in the same downtime. That means smaller runs of each size, less finished stock in the warehouse and the ability to react when a retailer suddenly orders more 1 litre bottles.
SMED Lean Metrics
You cannot prove a SMED lean improvement without numbers, and you cannot sustain one without tracking them. The most useful measures are:
- Changeover time: Last good part of the old run to first good part of the new run at full speed. This is the headline number.
- Internal versus external time: How much of the setup still needs the machine stopped. A rising external share shows the conversion step is working.
- Start-up scrap and first-pass yield: How many parts are lost or reworked after each changeover.
- Availability (part of OEE): Shorter setups raise the share of planned time the machine actually runs.
- Changeover consistency: The spread between the fastest and slowest changeovers. A wide spread usually means the standard is not being followed.
- EPEI (Every Part Every Interval): How often the line can cycle through all its products. Shorter changeovers make this interval shorter.
These sit comfortably alongside wider flow metrics such as lead time and work-in-progress, which show whether faster setups are actually speeding up the whole value stream. For a Six Sigma SMED project, add capability and defect measures from the standard set of Six Sigma metrics, for example the defect rate at start-up before and after the change.
Changeover Time and Batch Size
Changeover time and batch size are tightly linked. When setups are long, large batches look attractive because the setup cost is spread over more units. That logic is the reason many plants never shrink batches. They are not wrong about the maths; they are working with a changeover time that is too long.
Here is a simple illustration. Suppose a press makes four different parts, needs 1,000 units of each per week and allows itself 8 hours of changeover time a week.
| Changeover time | Changeovers possible in 8 hours | Typical batch size | Average stock of each part |
| 2 hours | 4 per week | 1,000 units (one week's demand) | About 500 units |
| 30 minutes | 16 per week | 250 units | About 125 units |
| 10 minutes | 48 per week | About 83 units | About 42 units |
The same weekly setup budget now buys 12 times as many changeovers. Batches shrink, average stock falls by more than 90 percent and the press can switch to whatever customers need next. This is why SMED is often described as the foundation for mixed model production and just-in-time flow. A word of caution: the gains only appear if planners actually reduce batch sizes. If the plant keeps running the old batch sizes, the saved time just becomes extra capacity, which is useful only when that machine is a bottleneck.
Common SMED Mistakes
SMED is simple to explain but easy to get wrong. These are the mistakes we see most often:
- Skipping the observation step. Teams jump to solutions from memory. Without video and timed elements, they miss the biggest losses, which are often walking and waiting.
- Spending money first. Hydraulic clamps and new tooling have their place, but the separate and convert steps usually deliver large gains for very little cost. Buy hardware after you have used up the cheap wins.
- Stopping the clock too early. Measuring until the machine restarts, not until good parts flow, hides adjustment time and start-up scrap.
- Leaving operators out. The people who do changeovers every day know where time goes. A SMED project designed by engineers alone rarely sticks.
- Ignoring the external setup. Moving work outside the stop only helps if that external work is reliable. A missing part found five minutes before the changeover still stops the line.
- Treating SMED as a one-off. The first pass might cut a setup from 90 to 30 minutes. Later passes reach the single minute target.
Skipping Standardization
This mistake deserves its own section because it is the most common reason SMED gains disappear. A team runs a great project, cuts a changeover from 60 minutes to 15, celebrates and moves on. Six months later, the changeover is back at 40 minutes.
Usually, nothing dramatic happened. The night shift was never trained on the new method. A kit cart was borrowed and not returned. Someone found a "faster" way that skipped a check, and quality problems crept back. Without written standard work, visual instructions and regular audits, each person slowly goes back to their own habits.
To prevent this, assign a process owner, display the standard at the machine, keep the kit carts and shadow boards under 5S discipline, and review changeover times in daily team meetings. Treat any slip from the standard as a signal to investigate, not as a failure to blame on individuals.
SMED in Lean Six Sigma Projects
SMED is a lean tool at heart, but it fits naturally into Lean Six Sigma work. Lean speeds up flow by removing waste, and Six Sigma reduces variation. A good SMED project does both: it removes waiting and motion from the changeover, and it reduces the variation in setup times and start-up quality. Both aims sit at the core of the Lean Six Sigma principles.
Within DMAIC, SMED maps neatly to each phase:
- Define: Pick the machine or line where changeover time causes the most pain, such as a bottleneck or a line forced into large batches.
- Measure: Video the changeover, time every element and set a baseline for changeover time and start-up scrap.
- Analyze: Separate internal from external elements and find the root causes of delays and adjustments.
- Improve: Convert internal to external work and streamline every element.
- Control: Lock in standard work, checklists and tracking so the gains last.
For anyone leading process improvement in manufacturing, SMED is often one of the quickest ways to show measurable results, which makes it a popular first project for new Green Belts. If you want to build the skills to run projects like this, the Simpliaxis Lean Six Sigma Green Belt certification covers DMAIC, lean tools and the statistics that back them up.
SMED as a Kaizen Event
Many plants run SMED as a Kaizen event: a short, focused improvement workshop that usually lasts three to five days and targets one machine or line. A typical plan looks like this:
- Day 1: Train the team on SMED basics, then film and time a live changeover.
- Day 2: Break the video into elements, classify them as internal or external and agree on target times.
- Day 3: Make quick changes on the floor, such as building kit carts, marking positions and adding checklists, then run a trial changeover.
- Day 4: Run more trials, remove adjustments where possible and draft the standard work.
- Day 5: Present results to management and agree on a 30-day action list for items that need more time or budget.
The team should include the operators who do the changeover, a maintenance technician, a quality representative and a facilitator. Mixing roles matters: operators bring the detail, maintenance knows what can be modified, and quality makes sure faster does not mean riskier. A well-run event often halves the changeover time within the week, and the follow-up actions take it further.
Conclusion
SMED turns changeovers from a reason to avoid switching products into a routine, predictable task. The method itself is not complicated. Watch and record the changeover, separate internal from external work, move as much as possible outside the stop, simplify what is left and make the new way the standard. Quick-release fasteners, parallel operations and preset tooling then squeeze out the remaining minutes.
The real payoff goes beyond a faster setup. Shorter changeovers make smaller batches, lower inventory, mixed model production and faster customer response possible. That is why Shingo's idea, born from watching operators search for a missing bolt, is still one of the most widely used lean tools in manufacturing today.
If you want to apply SMED and other lean tools inside structured improvement projects, the Simpliaxis Lean Six Sigma Green Belt course is a practical next step. You can also check your readiness with the Lean Six Sigma Green Belt practice test, which covers lean concepts like setup reduction alongside DMAIC and core statistics.









 Lowest-Price Challenge













 Personalized Path



.webp)


 USA
 Canada
 India
 UK
 Australia
 Singapore


